





How to Make Party Lights Look Better on Camera: A Practical Photo and Video Guide
Party lights can look vivid in the room and disappointing on a phone. Colors turn white, faces disappear, moving patterns smear, and lights that seemed steady begin to flicker in video.
The usual fix is not “more brightness.” A camera needs a clearer division of labor: one light helps people look good, while another creates color and movement in the background. Once those jobs are separated, a few placement and camera adjustments can make a much bigger difference than adding another fixture.
This guide covers a reliable setup for phone photos, short-form video, livestreams, and event footage.
Start With Two Lighting Jobs
Use one layer for people and one for atmosphere.
The face light should be soft, steady, and neutral enough to keep skin tones readable. It can be a dimmed room light, a small video light, a bounced lamp, or an LED wash aimed at a wall rather than directly at guests.
The effect light can add animation, beams, color, UV, gobos, or a moving disco effect. Aim it at the background, ceiling, or dance-floor area instead of using it as the only source on people’s faces.
This separation prevents two common failures: a bright effect clipping into a white blob, and guests becoming silhouettes against a colorful wall.
For a small room, start with one soft source near the camera and one effect fixture across the room. In a larger space, keep the same logic and add coverage only where the camera sees a dark gap.
Put the Effect Behind or Beside the Subject
The strongest camera angle usually has the effect light behind the people being photographed, or 30 to 60 degrees to one side. This gives the background color and shape without flooding faces with saturated red, blue, or green light.
Avoid pointing every fixture toward the camera. Direct beams can create flare, flatten contrast, and cause the phone to darken the rest of the frame. If the effect crosses the lens, move the fixture farther to the side or aim it higher onto a wall or ceiling.
Raise the effect light above table height when possible. A stable shelf or properly rated stand keeps the pattern visible above the crowd and reduces blocked beams. Secure the fixture and cables, follow the manual, and never aim laser effects toward faces, windows, roads, aircraft, or reflective hazards. Review the FDA’s laser-product safety guidance, then use the KeoBin stage-lighting safety checklist for event setup.
Give Faces a Little More Light Than You Think
Phone cameras often brighten dark scenes automatically. That sounds helpful, but it can raise noise, soften detail, and blow out small bright lights.
Add a modest amount of steady light near the camera instead. Keep it above eye level and slightly off to one side. If the light looks harsh, bounce it off a white wall or ceiling. The goal is not to erase the party atmosphere; it is to give the camera enough information to hold detail in faces.
Check a short test clip before guests arrive. If the room looks exciting but people still look gray or noisy, increase the face light first. If faces look natural but the effects look pale, reduce the face light slightly or move the effect farther into the background.
Choose an Effect You Can Slow Down
Fast movement looks energetic to the eye, but it can turn into blur or visual clutter on video. Start with a slower program, fewer simultaneous effects, and a lower strobe rate. Save the fastest scene for a short dance-floor moment rather than running it all night.
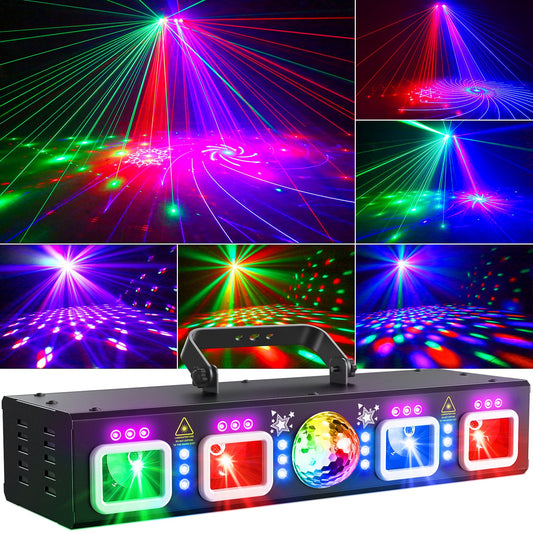
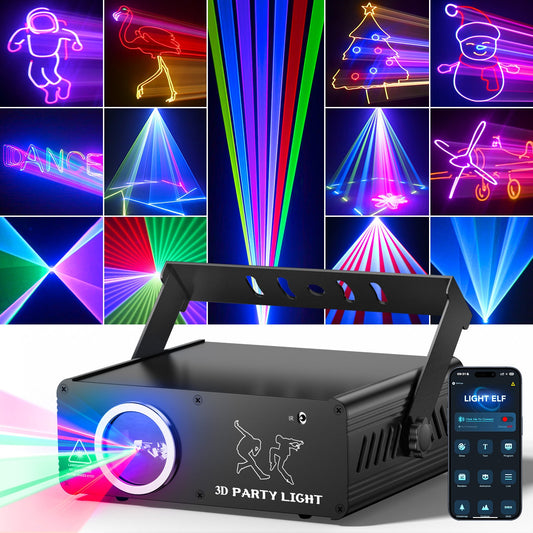
Repeatable control helps when you need several takes. An app-controlled animation light such as the KeoBin L2400-002 can be useful when the shot needs a specific graphic, name, message, or animation instead of a random pattern. For a broader mix of rotating color, beams, UV, and strobe from one unit, a multi-effect fixture such as the L2500 gives you several looks without filling the room with separate lights.
Use sound activation when you want spontaneous movement with music. Use remote, app, auto, or DMX control when consistency matters more than surprise. For technical context, DMX512-A is maintained as ANSI E1.11 by ESTA’s Technical Standards Program.
Fix Flicker and Dark Bands Before the Event
Some LED effects appear steady to your eyes but show pulsing or dark bands on camera. This happens when the light’s output cycle and the camera’s frame or shutter timing do not align.
For video in the United States, a practical starting point is:
- 30 frames per second with a shutter speed near 1/60 second;
- 60 frames per second with a shutter speed near 1/120 second;
- anti-flicker or flicker-reduction mode enabled, if your camera offers it.
On a phone, look for anti-flicker, anti-banding, or frequency settings in the camera app. Choose 60 Hz when that option is available for a U.S. location. Not every phone exposes manual controls, so record a ten-second test at the exact brightness and effect mode you plan to use.
If bands remain, change one variable at a time: shutter speed, frame rate, effect brightness, or effect mode. Slow-motion recording is more demanding and may reveal flicker that normal-speed video does not. No camera setting can guarantee that every effect mode will be flicker-free, so testing the actual fixture and shot is essential.
Lock Exposure and White Balance
Automatic camera controls can chase every flash and color change. The result is a clip that pumps brighter and darker or shifts from warm to cool every few seconds.
On a phone, tap and hold on a face to lock focus and exposure when the camera app supports it. Apple’s official guide explains how to adjust and lock focus and exposure on iPhone. Pull exposure down slightly if bright patterns lose all color. On a camera with manual controls, set exposure using the face light, then check that the effect highlights still retain color and shape.
Lock white balance when possible. A neutral starting point keeps skin tones from changing every time a blue or magenta effect sweeps across the scene. If the room mixes several light sources, turn off unnecessary overhead bulbs rather than asking automatic white balance to solve three different color temperatures at once.
Use Haze Carefully—or Skip It
Haze can reveal beams that would otherwise appear only where they hit a surface. It is especially useful with the L2600 RGB animation light, whose product guidance recommends haze or fog for visible beam effects.
The camera needs much less haze than a club might use. Too much lowers contrast, softens faces, and can make the room look smoky rather than dimensional. Add a small amount, wait for it to spread, and check the camera. Always confirm venue rules, ventilation, and smoke-detector requirements before using atmospheric effects.
If haze is not allowed, aim patterns at a textured wall, curtain, or ceiling. The camera can record the projected result without needing visible mid-air beams.
Build a Camera Test in Five Minutes
- Frame the shot before turning on every effect.
- Add a soft face light and make sure eyes and skin are readable.
- Turn on one effect fixture and aim it at the background.
- Record ten seconds with people moving, not an empty room.
- Check faces, highlight detail, blur, flicker, and unwanted beams entering the lens.
Make one change and repeat. This is faster than adjusting several lights at once and not knowing which change helped.
If you are also planning a livestream or a recurring small-venue setup, see the guide to lighting a livestream or small venue.
Quick Setup by Use Case
Phone photos at a home party
Use one soft, steady light near the photographer and one slower effect on the wall behind guests. Avoid strobe during posed photos. Expose for faces, then reduce the effect brightness if colors clip.
Short-form dance video
Place the effect behind or to the side of the dancer, keep a steady face light near the phone, and use a repeatable effect mode. Record a test with the same frame rate you will use for the final clip.
Livestream or karaoke
Prioritize an even face light and keep animated effects on the rear wall. Sound activation can work for musical sections, but a stable programmed scene is easier to watch during speaking.
DJ recap footage
Use a wide effect for room energy and a controlled animated or laser layer for detail. Capture a few short clips at normal speed before trying slow motion. A multi-effect model can simplify setup, while separate control lets you repeat a strong look for the camera.
Frequently Asked Questions
Why do party lights look washed out on my phone?
The effect may be too bright compared with the rest of the scene, causing the phone to clip its color. Add gentle light to faces, move the effect farther into the background, and lower exposure or effect brightness until color returns.
How do I stop party lights from flickering in video?
In the United States, begin with 30 fps at about 1/60 second or 60 fps at about 1/120 second, then enable anti-flicker or 60 Hz anti-banding if available. Test the exact effect mode because dimming and strobe settings can change the result.
Should party lights point at the camera?
Usually not. Direct beams can create flare and force the camera to underexpose the room. Aim effects at the background or place them off-axis, and follow all product and laser-safety instructions.
Are sound-activated lights good for video?
They are good for energetic, spontaneous clips. For interviews, livestreams, product shots, or repeated takes, a controlled auto, app, remote, or DMX scene is usually more consistent.
Do I need more than one party light?
Not always. A single multi-effect fixture can create a strong background. What it cannot do well by itself is provide both flattering face light and dramatic effects, so pair it with a soft, steady source when people are the subject.
A Better Camera Image Starts With Better Roles
The simplest reliable setup is one steady light for people and one controlled effect for the room. Place the effect behind or beside the subject, keep direct beams out of the lens, lock the camera when possible, and record a short test before the event.
You do not need the brightest setting or the largest number of fixtures. You need light that gives the camera a clear subject, a readable background, and an effect it can record cleanly.
Ready to build the background layer? Compare KeoBin party and DJ lights by effect type.